
You have spent hours building a complex dashboard. The formulas are perfect, the layout is clean, and the data is accurate. Then, you send it to a colleague.
Within five minutes, they accidentally type over a crucial formula, and the whole spreadsheet breaks. We have all been there.
Learning how to lock cells in Excel is the only way to “stupid-proof” your spreadsheets. It allows you to let users edit specific areas (like input fields) while keeping your calculations and headers completely safe.
In this guide, we will walk you through the correct process to protect your sheet, which is slightly counter-intuitive but easy once you know the secret.
The Logic Behind How to Lock Cells in Excel: Unlock First
Many users get stuck because they try to “lock” specific cells immediately. However, Excel works backwards:
- Default State: ALL cells in Excel are technically “locked” by default, but the lock is not active until you turn on sheet protection.
So, the process to lock only specific cells (like your formulas) is actually:
- Select the cells you want people to EDIT.
- Unlock those specific cells.
- Turn on Protection for the whole sheet (which activates the lock on everything else).
Let’s do it step-by-step.
Step 1: Select the Cells You Want to Be Editable
First, identify the “input cells”—the places where you want users to type numbers or data.
- Highlight the cells or ranges you want to leave open for editing.
- Hold down the
Ctrlkey to select multiple non-adjacent cells if needed.
Step 2: Unlock the Selected Cells
Now we tell Excel: “These specific cells should NOT be locked when I turn on protection.”
- Right-click on your selection and choose Format Cells… (or press
Ctrl + 1). - Go to the Protection tab on the far right.
- Uncheck the box that says “Locked”.
- Click OK.

At this point, nothing seems to happen. That is normal. You have just prepared the settings.
Step 3: Activate Sheet Protection
This is the final step that applies the lock.
- Go to the Review tab on the top ribbon.
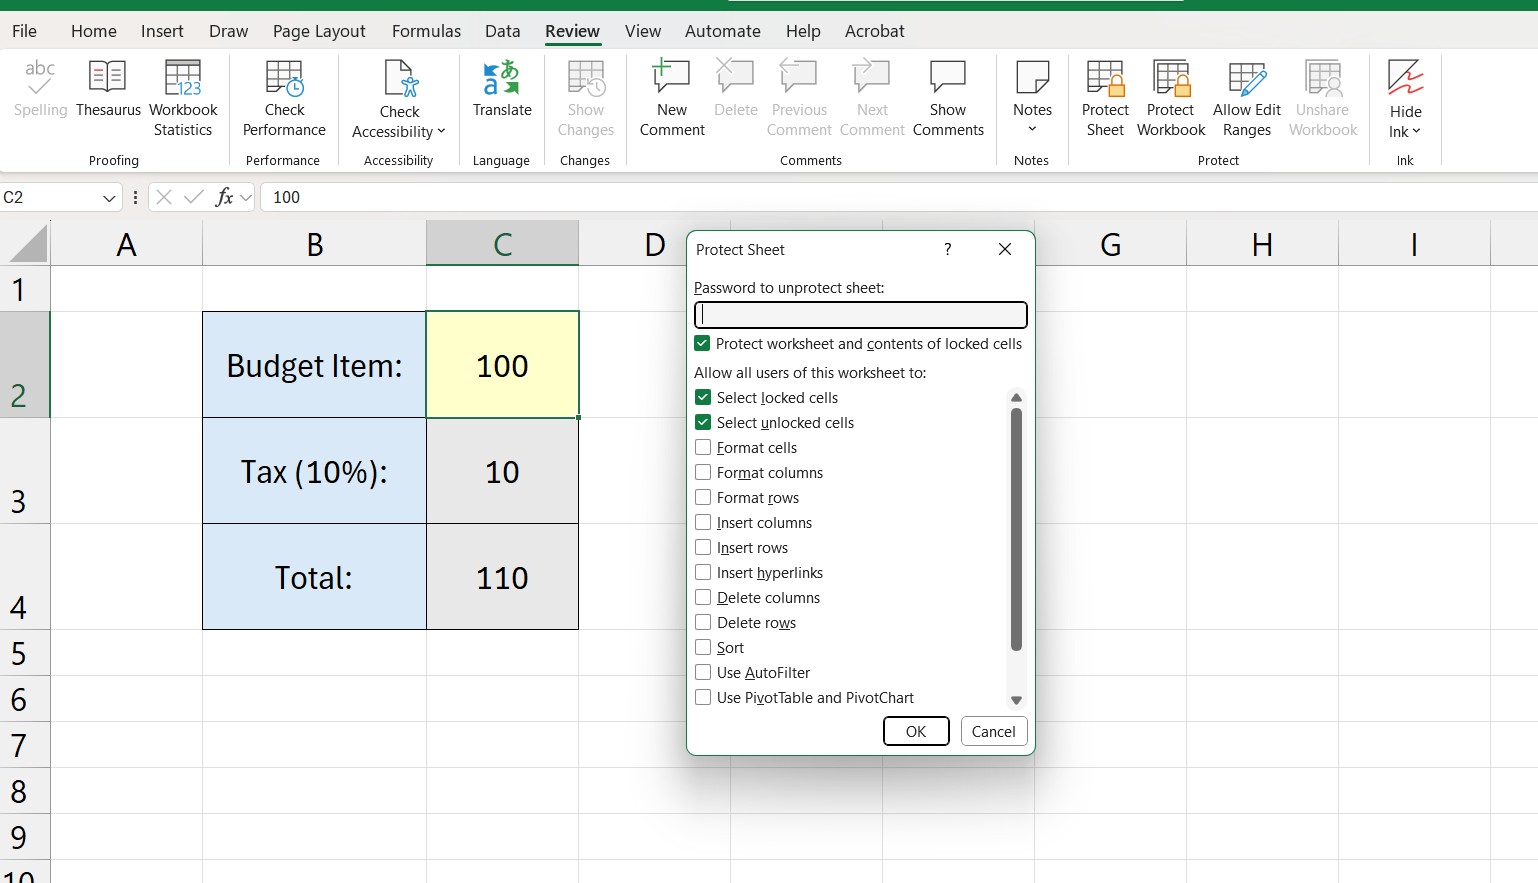
- Click Protect Sheet.
- A dialog box will appear asking for a password.
- Optional Password: If you add a password, users cannot unprotect the sheet without it. If you leave it blank, they can unprotect it easily (good for preventing accidental clicks).
- Make sure the box “Select unlocked cells” is checked. You can uncheck “Select locked cells” if you don’t even want users to click on your formulas.
- Click OK.
Now, try typing in a formula cell. Excel will show an error message saying the cell is protected. Try typing in your input cells. It works perfectly!
How to Unlock the Sheet Later
If you need to make changes to your design later, you simply reverse the last step:
- Go to the Review tab.
- Click Unprotect Sheet.
- Enter your password (if you set one).
Troubleshooting: When You Cannot Lock Cells
Sometimes, even after following the steps on how to lock cells in excel, you might face issues where the options are grayed out or the protection does not behave as expected.
Here are the most common reasons:
- Shared Workbooks: If you are using the “Share Workbook” legacy feature, you cannot change protection settings. You must unshare it first.
- Grouped Sheets: If you have multiple tabs selected at the bottom (grouped), Excel disables the format menu. Right-click a tab and select “Ungroup Sheets”.
- Lost Password: If you forgot the password to unlock your sheet, Excel does not have a “forgot password” button. It is crucial to remember it.
For a deep dive into specific limitations, you can verify the official Microsoft Support page on worksheet protection.
Conclusion
Knowing how to lock cells in Excel elevates you from a basic user to a template creator. It ensures your hard work remains intact no matter who uses your file.
By following the “Unlock then Protect” method, you create professional, error-free spreadsheets that are safe to share with your team.
Now that your data is secure, you might want to learn how to visualize it better. Check out our guide on How to Create a Scatter Plot in Excel to display your trends effectively.