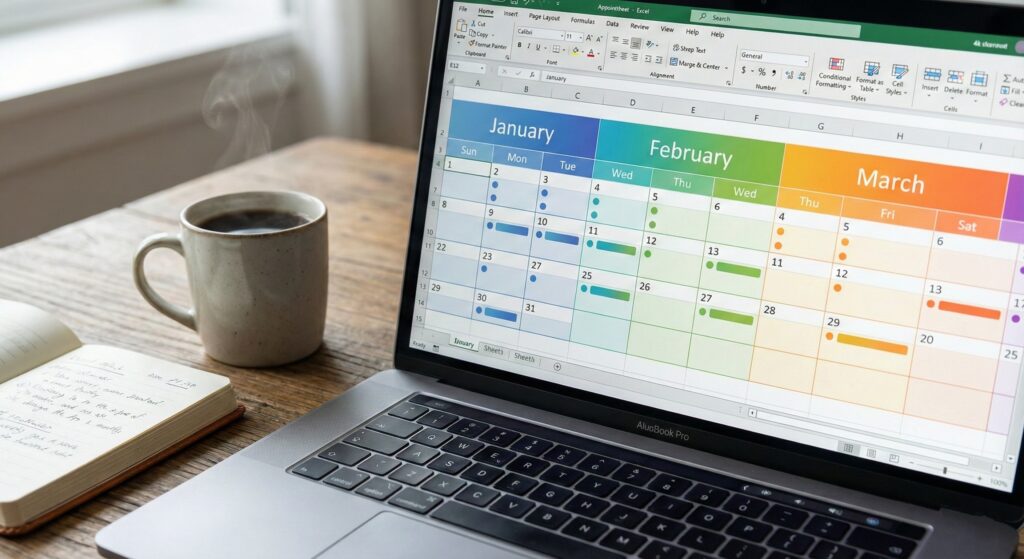
Are you tired of buying paper planners or relying on rigid apps that don’t fit your workflow? It is time to learn how to make a calendar in Excel.
With 2026 just around the corner, creating a custom calendar gives you complete control. Whether you need a simple monthly overview, a complex project management timeline, or a content planner for social media, Excel is the most flexible tool for the job.
In this comprehensive guide on how to make a calendar in Excel, we will move beyond the basics. We will explore three distinct methods to build a calendar: using pre-made templates (the fast way), designing one from scratch (the creative way), and building a fully automated dynamic calendar using formulas (the professional way).
By the end of this tutorial, you will have a reusable tool that saves you hours of planning time.
Method 1: The Instant Solution (Using Excel Templates)
If you are looking for the fastest way to learn how to make a calendar in Excel in less than 60 seconds, Microsoft has already done the heavy lifting. This is the best method for beginners who want to skip the design phase.
Step-by-Step Guide:
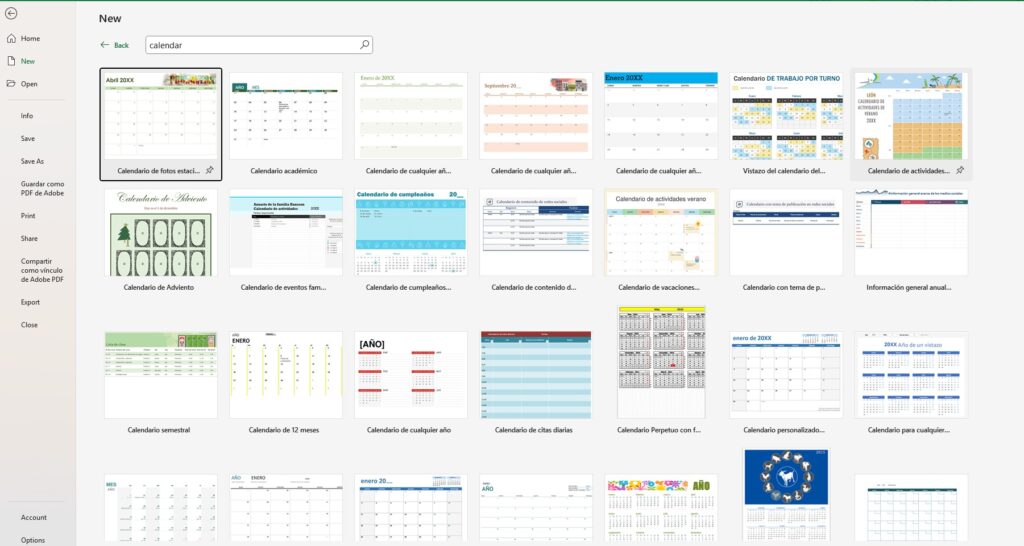
- Open Microsoft Excel.
- Click on File > New.
- In the search bar labeled “Search for online templates,” type: Calendar.
- Press Enter. You will see dozens of options, including:
- Any Year One-Month Calendar: Allows you to type the year and automatically updates dates.
- Academic Calendar: Perfect for students and teachers (starts in August/September).
- Seasonal Photo Calendar: Great for printing and hanging on a wall.
- Select the design you like and click Create.
Pro Tip: Look for templates labeled “Any Year.” These contain hidden formulas that allow you to reuse the same sheet for 2026, 2027, and beyond just by changing a single cell.
Method 2: The Manual Grid (Custom Design for Printing)
Do you want specific colors, fonts, or a layout that fits on a single A4 page? Learning how to make a calendar in Excel manually gives you total design freedom. This method creates a static calendar (you type the numbers manually).
Setting Up the Grid
- Open a blank workbook.
- Highlight Columns A through G. Click the letter ‘A’ header and drag to ‘G’.
- Adjust Column Width. Right-click on the selected headers > Column Width. Set it to roughly 15 or 20 (depending on how much text you want to write in each day).
- Create the Days of the Week.
- In cell A2, type “Monday”.
- In cell B2, type “Tuesday”, and so on until Sunday (G2).
- Shortcut: Type “Monday” in A2 and use the Fill Handle to drag it across to G2.
- Format the Header.
- Select cells A1:G1.
- Click Merge & Center on the Home tab.
- Type your Month and Year (e.g., “January 2026”).
- Make the font large (Size 24+) and bold.
Creating the Days
- Select rows 3, 5, 7, 9, and 11. Set their Row Height to 80 (or larger). These will be the boxes where you write your events.
- Select rows 4, 6, 8, 10, and 12. Set their Row Height to 15. These small rows will hold the date numbers (1, 2, 3…).
- Add Borders: Select the entire grid area (A2:G12). Go to the Borders menu and select All Borders and then Thick Outside Borders.
- Fill in the Dates: Look up a 2026 calendar and manually type the numbers into the small rows.
This method is static. If you change the month, you have to re-type the numbers. That leads us to the advanced method.
Method 3: The “Pro” Way (Building a Dynamic Automated Calendar)
This is where the magic happens. We will build a calendar where you simply select “January” and “2026” from a dropdown list, and Excel automatically rearranges the days for you.
To master how to make a calendar in Excel dynamically, we will use the SEQUENCE and DATE functions (available in Excel 2021 and Microsoft 365).
Step 1: Create the Controls
- In cell I1, type “Year”. In J1, type “2026”.
- In cell I2, type “Month”. In J2, type “1” (for January).
- Optional: You can use Data Validation to create a dropdown list for the months to make it user-friendly.
Step 2: The Logic
We need Excel to calculate what day of the week the first of the month falls on. In a helper cell (e.g., K1), type this formula: =DATE(J1, J2, 1) This gives us the first day of the selected month.
Step 3: The Spill Formula
Now, go to cell A3 (under your “Monday” header). We want to generate a 6-week grid of dates automatically.
Type this formula: =SEQUENCE(6, 7, DATE(J1, J2, 1) - WEEKDAY(DATE(J1, J2, 1), 2) + 1)
How this works:
DATE(...): Gets the 1st of the month.WEEKDAY(..., 2): Finds out if the 1st is a Monday, Tuesday, etc. (The ‘2’ tells Excel that Monday is the start of the week).SEQUENCE(6, 7): Creates a grid of 6 rows and 7 columns.- The math essentially “rewinds” to the previous Monday to start the calendar grid correctly.
Now, if you change cell J2 to “2” (February), the entire calendar updates instantly.

Step 4: Fix the “Weird Numbers” (Crucial Step)
After hitting Enter, you might see a block of strange 5-digit numbers (like 46020, 46021…). Don’t panic! These are just Excel’s internal codes for dates.
Here is how to make them look like a calendar:
- Select the entire grid of numbers generated by the formula.
- Press Ctrl + 1 (or right-click > Format Cells).
- In the “Category” list, choose Custom.
- In the Type box, delete the text and type simply the letter:
d - Click OK.

Now, instead of 46020, you will see just the day number (e.g., 29, 30, 1, 2…). Much better!
Designing for Use Cases
Now that you have mastered how to make a calendar in Excel, how can you apply this to your daily life?
1. The Content Calendar (Social Media)
Marketers love Excel for this. Add extra columns next to your calendar grid for:
- Platform: (Instagram, LinkedIn, TikTok)
- Status: (Drafting, Approved, Posted)
- Visuals: Link to the image file. Use Data Validation to create dropdown lists for the Status column to keep your workflow clean.
2. The Project Management Tracker (Gantt Style)
Instead of a standard monthly view, list days 1-31 in columns across the top (Row 1) and list your Tasks in Column A. Use Conditional Formatting to color in cells based on start and end dates. This creates a simple visual timeline without needing expensive project management software.
3. The Financial Bill Tracker
Create a calendar specifically for finances.
- List recurring bills on their due dates.
- Use the IF function to flag overdue payments.
- Example:
=IF(TODAY() > A3, "Overdue", "Upcoming").
Advanced Formatting Tips
To make your calendar truly shine, use these formatting tricks:
Gray Out Previous Month’s Days: If your dynamic calendar shows dates from the previous month (e.g., Nov 30th on a Dec 1st calendar), you can make them look faint.
- Select your calendar dates.
- Go to Conditional Formatting > New Rule.
- Select “Use a formula to determine which cells to format”.
- Formula:
=MONTH(A3)<>$J$2(assuming J2 is your selected month number). - Set the format to a light gray font color.
Highlight “Today”: Never lose your place.
- Select the grid.
- Conditional Formatting > Highlight Cell Rules > Equal To.
- Type:
=TODAY(). - Choose a custom format (e.g., bright yellow fill with bold text).

Frequently Asked Questions (FAQ)
How to make a calendar in Excel with bullet points inside the cells? Excel doesn’t have a bullet button like Word. However, you can use a keyboard shortcut. Double-click the cell, press Alt + 7 (on the number pad) to insert a bullet point. Or, simply type a dash (-) followed by a space.
Can I sync my Excel calendar with Outlook or Google Calendar? Direct syncing is difficult without using scripts (VBA). However, you can save your Excel file as a CSV file and import that CSV into Google Calendar or Outlook. This is a one-way transfer, not a live sync.
How do I print my calendar on one page? Calendars often spill onto two pages.
- Go to Page Layout.
- Click the small arrow in the bottom right of the Page Setup group.
- Under the Page tab, select Fit to: 1 page wide by 1 page tall.
- Go to the Margins tab and check “Horizontally” and “Vertically” under “Center on page” for a professional look.
Conclusion
Learning how to make a calendar in Excel is a skill that pays off all year long. Whether you choose a quick template for printing or build a sophisticated dynamic dashboard for your business, you now have the tools to organize 2026 effectively.
Don’t wait for the New Year to get organized. Open Excel, type =SEQUENCE, and start planning your success today
Now that you have your 2026 calendar ready, it is time to fill it with your data. If you are importing large lists of tasks, holidays, or events, you want to avoid errors and repetitions.
Check out our essential guide on How to Remove Duplicates in Excel to keep your new calendar clean and organized.