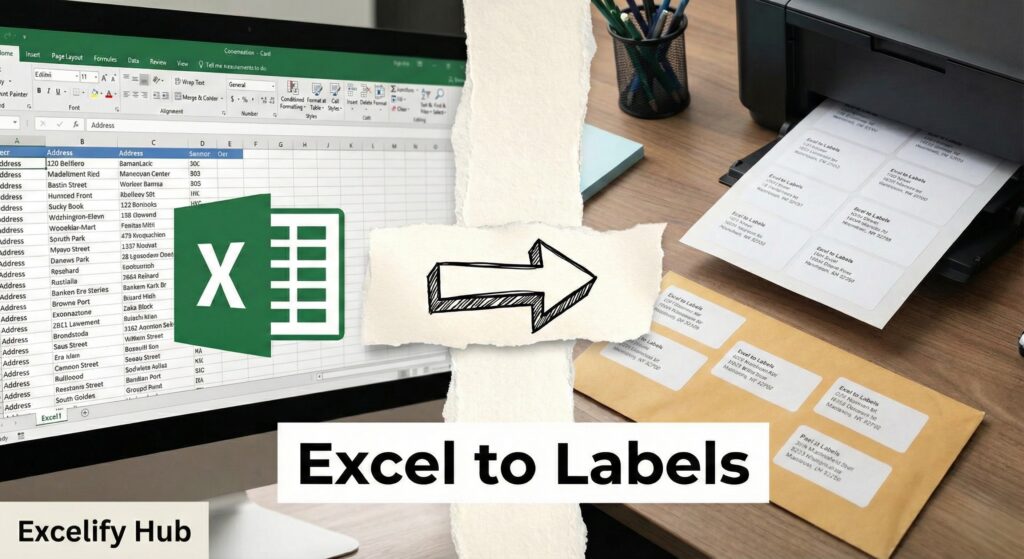
Imagine you have to send 500 Christmas cards or wedding invitations. You have all the addresses in an Excel sheet.
Are you going to type them one by one into Word? Or copy-paste 500 times? Absolutely not.
You can link Excel to Word to create printable labels automatically. This process is called Mail Merge, and it turns a 5-hour job into a 5-minute job.
In this guide, you will learn how to print address labels from Excel without headaches.
Step 1: Prepare Your Excel Data (The Most Important Part)
Before opening Word, your Excel file must be perfect.
- Headers: The first row must contain headers like “First Name”, “Address”, “City”.
- No Blank Rows: Remove empty rows before the data starts.
- Save and Close: You must close the Excel file before starting the merge in Word, or it will trigger an error.
Step 2: Set Up Labels in Word
- Open Microsoft Word and open a blank document.
- Go to the Mailings tab.
- Click Start Mail Merge > Labels.
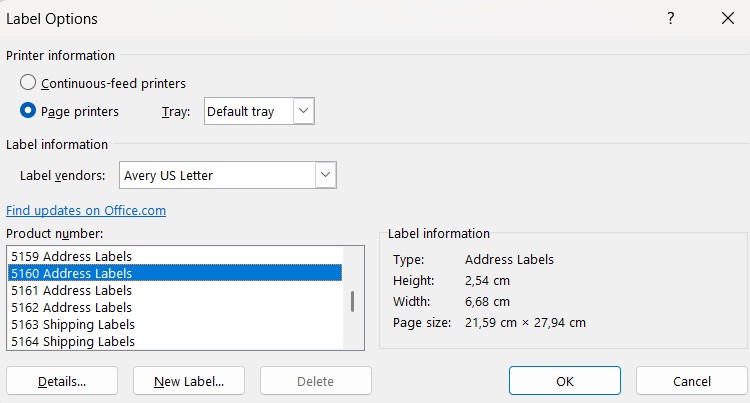
- A window will pop up. Choose your label vendor (e.g., Avery US Letter) and product number (e.g., 5160 Address Labels).
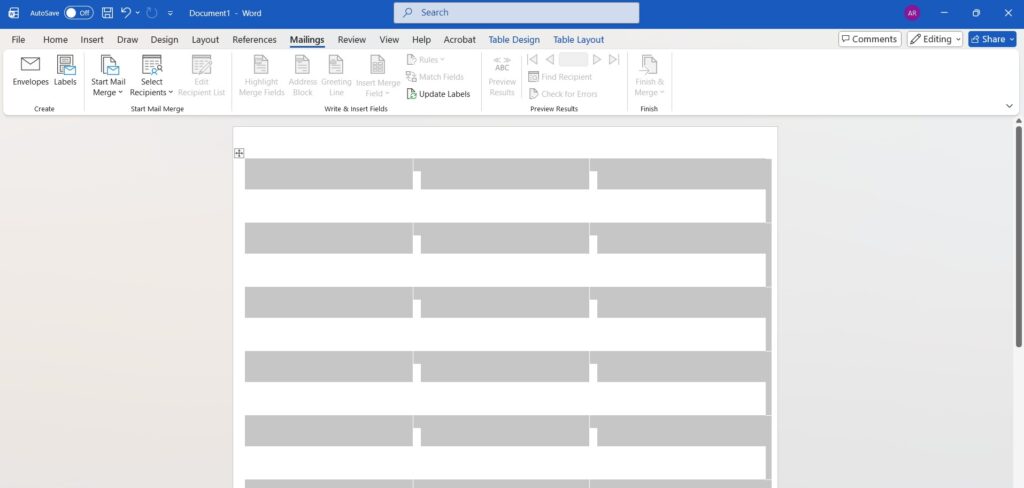
- Click OK. You will see a grid of empty boxes on your page.
Step 3: Link Excel to Word
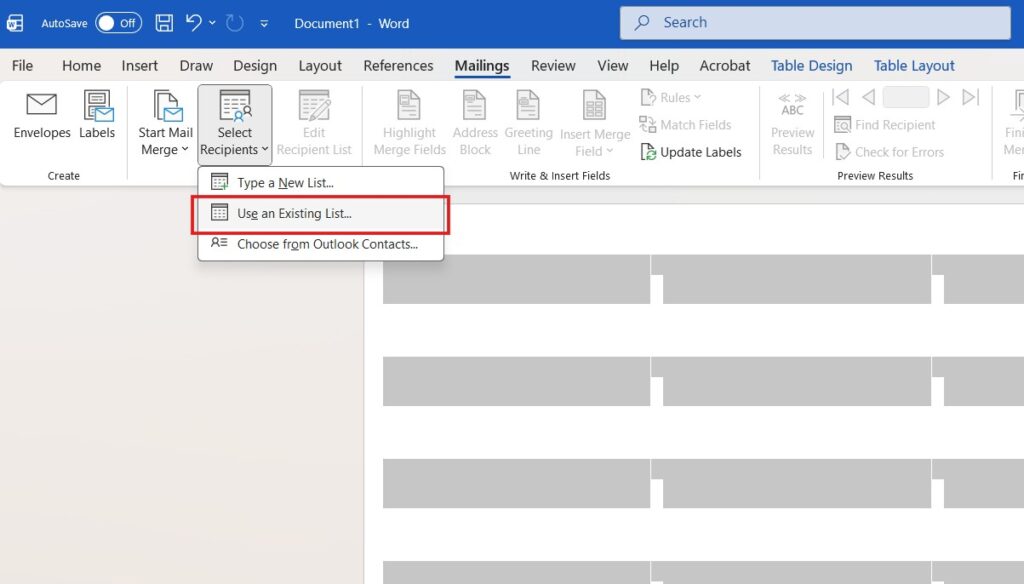
- On the Mailings tab, click Select Recipients.
- Choose Use an Existing List.
- Find and select your Excel file (
Address_List.xlsx). - If asked, confirm the Sheet (e.g., Sheet1) and check “First row of data contains column headers”.
- Click OK.
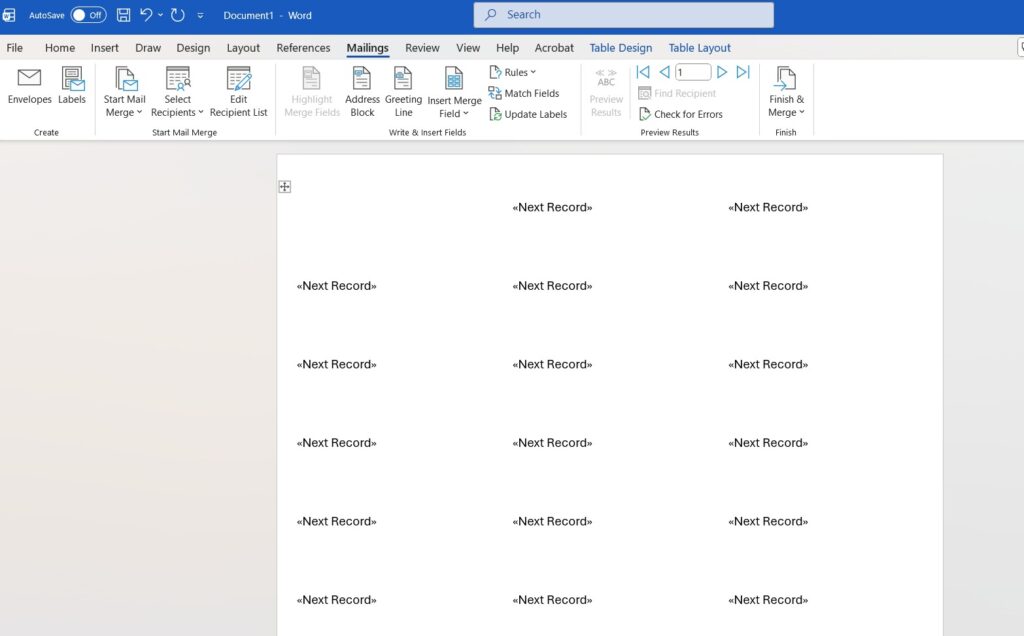
You will now see <<Next Record>> in all the label boxes except the first one. This is good!
Step 4: Insert Your Fields
Now we tell Word where to put the names and addresses.
- Click inside the first label (the top-left one).
- Go to Mailings > Insert Merge Field.
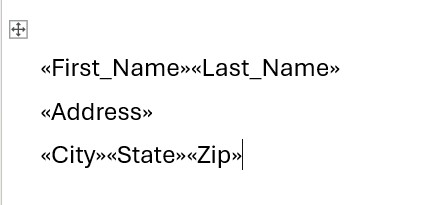
- Select your fields one by one and arrange them. It should look like this:
<<First Name>> <<Last Name>><<Address>><<City>>, <<State>> <<Zip>>
Step 5: Replicate to All Labels
This is the step everyone forgets!
- Once your first label looks perfect, click the button Update Labels (in the “Write & Insert Fields” group).
- Word will instantly copy your format to all the other labels on the page.

Step 6: Preview and Finish
- Click Preview Results. You will see real names appearing instead of the weird
<<codes>>. - Click Finish & Merge > Edit Individual Documents.
- Select All and click OK.

Word will create a new document with all your 500 labels ready to print.
Frequently Asked Questions (FAQ)
Why are my Zip Codes missing the leading zero? Excel sometimes removes the zero from zip codes (e.g., “01234” becomes “1234”). To fix this, format the Zip column in Excel as “Text” before typing the numbers.
Can I add images or logos? Yes. Insert the image into the first label before clicking “Update Labels”. It will be copied to all of them.
Organizing your list? Before printing, make sure you don’t have the same person twice! Use our guide on How to Remove Duplicates in Excel to clean your list first.