
Have you ever received a spreadsheet where the First Name and Last Name are stuck together in one cell (e.g., “John Smith”)? Or maybe a list of addresses that aren’t separated by city and state?
Retyping everything manually is not an option. You need the Text to Columns wizard.
This powerful tool allows you to split a single column of text into multiple columns based on a delimiter (like a comma, space, or tab).
In this guide, we will show you how to clean your data in seconds.
When to Use Text to Columns
Use this feature when:
- Splitting Names: Converting “John Doe” into “John” (Column A) and “Doe” (Column B).
- Cleaning Imports: Fixing messy data pasted from a CSV file or website.
- Separating Dates: Splitting “01/15/2025” into Day, Month, and Year columns.
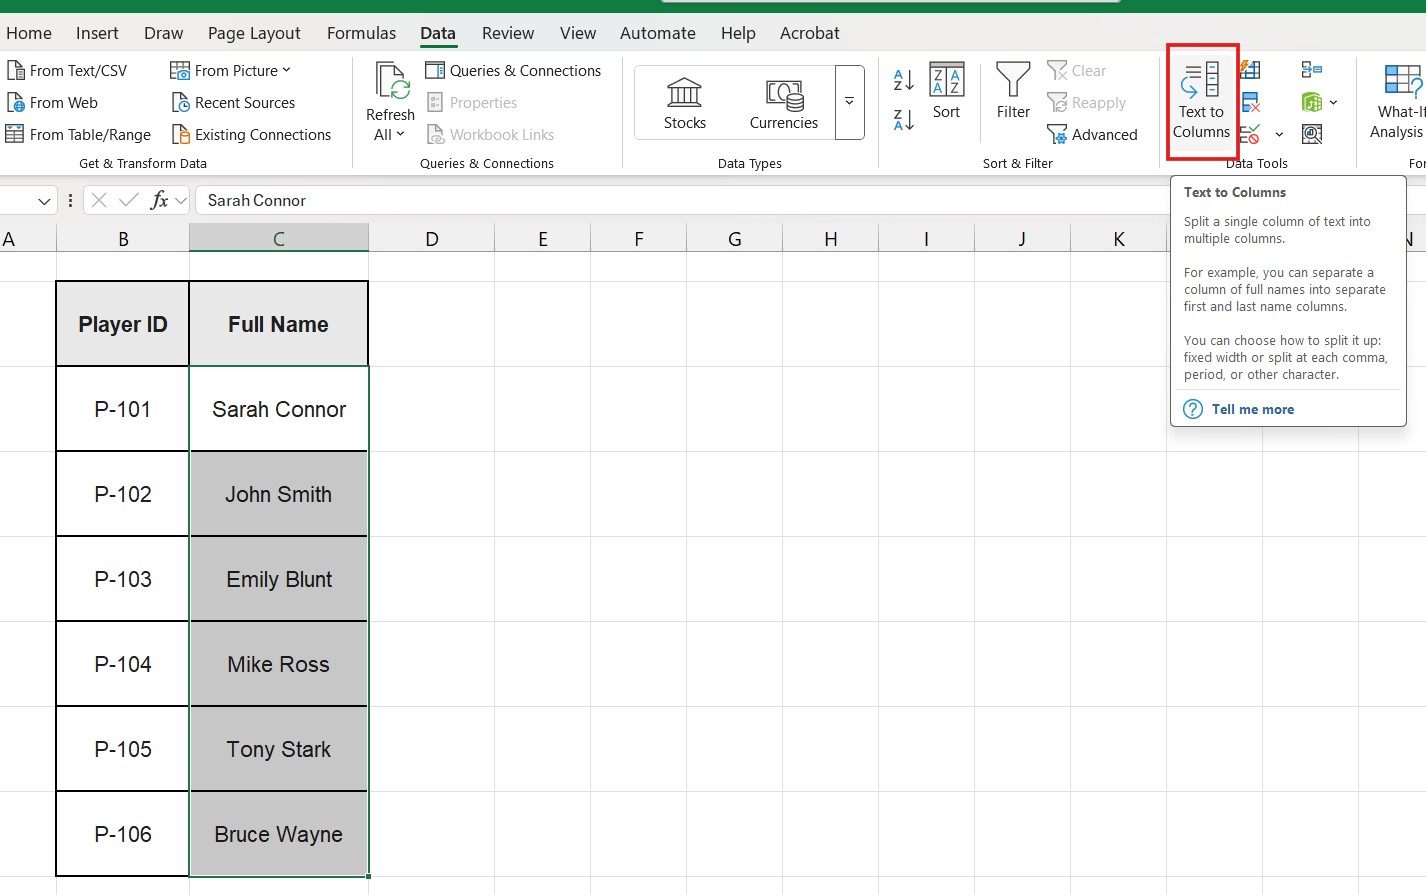
Step 1: Select Your Data
Highlight the column that contains the combined text.
- Warning: Ensure the columns to the right are empty. Excel will overwrite them with the split data.
Step 2: Open the Wizard
- Go to the Data tab on the top ribbon.
- Click on Text to Columns (in the Data Tools group).
Step 3: Choose Delimited vs. Fixed Width
The wizard will ask you to choose a file type:
- Delimited (Most Common): Characters such as commas or tabs separate each field. Use this for names (“John Smith”) or CSVs.
- Fixed Width: Fields are aligned in columns with spaces between each field. Use this only for very specific, structured system reports.
Select Delimited and click Next.
Step 4: Pick Your Delimiter
This is how you tell Excel where to cut the text.
- If splitting names (“John Smith”), check Space.
- If splitting a CSV list (“Apple,Banana,Orange”), check Comma.

You will see a “Data preview” at the bottom showing exactly how your columns will look. If it looks right, click Next.
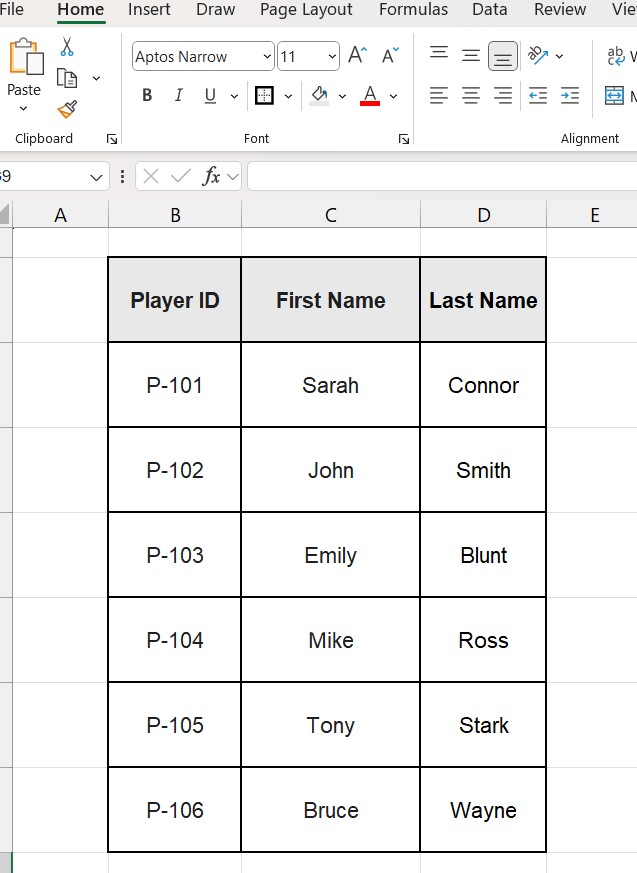
Step 5: Finish
Click Finish.
Excel will instantly separate your text into multiple columns.
Alternative: The FLASH FILL Method (Faster!)
If “Text to Columns” feels too complicated, try Flash Fill (available in Excel 2013 and later).
- Type the desired result in the cell next to your data (e.g., type “John”).
- Click the cell below it.
- Press Ctrl + E.
- Excel will learn the pattern and fill the rest automatically.

Frequently Asked Questions (FAQ)
Can I split text by a specific word? Yes. In the Delimiter step, check “Other” and type the specific word or symbol (e.g., “-“) you want to use as the break point.
Does this work with formulas? No, this is a static change. If the original data changes, the split columns won’t update. If you need a dynamic solution, you should use formulas like =TEXTBEFORE and =TEXTAFTER.
Keep your data clean Now that you have split your text into columns, you might find repeated entries in your list. Ensure your dataset is unique by following our guide on How to Remove Duplicates in Excel
Pingback: How to Count Cells with Text in Excel (COUNTA vs. COUNTIF Formulas) – ExcelifyHub
Pingback: How to Change Text Case in Excel: Upper, Lower & Proper 2025
Pingback: How to Combine Two Columns in Excel: Ultimate Guide (2025)